Dimforge Q2 2026 technical report − Nexus cross-platform GPU physics engine with rust-gpu

Already half a year has past! This article summarizes the most significant additions made during the second quarter of 2026 to our open-source crates we develop for the Rust community.
If you haven’t seen it already please check out our Q1 technical report because our Q2 work is the continuation of that exciting work. As promised, this second quarter led to the release of one of our new flagship projects: Nexus, a cross-platform GPU multi-physics engine.
We also started making improvements to Rapier, our CPU-based rigid-body physics engine, for addressing issues and limitations related to multibodies for robotics use-cases.
Finally, we have further enhanced the feature set of Kiss3d, or simple 2D and 3D graphics engine by bring a wide range of more advanced rendering effects.
Nexus is still early and experimental. We are still in the process of figuring out the best APIs. Expect rough edges and breaking changes. The examples provided on the repository are currently the main source of truth on how to use Nexus.
Nexus: cross-platform GPU physics
Nexus is cross-platform and even works on the web if your browser supports WebGPU (but not in Safari). Check out our online demos: https://nexus.dimforge.com/demos
We are very excited to release the first version of our GPU multi-physics engine: Nexus. It started as a port of our former WGSL-based work wgrapier. While it shares similar algorithms, it differs in multiple major ways:
- All the shaders are written 100% in Rust, using rust-gpu, khal, and vortx.
- It implements more features including multibody joints, multiple colliders per bodies, and dynamic insertion of rigid-bodies.
- It implements batch simulation to run thousands of variants of the same scene in parallel. This is typically used for Machine Learning like Reinforcement Learning, and, more generally, training datasets generation.
- It is generally 2x faster than our WGSL implementation, and has a much smaller performance gap between running natively and on the browser.
URDF, MJCF and multibody support are still experimental. We are working on improving their performances and stability.
 Keva tower |  Compound colliders |  Trimesh & convex |
 Joints and bodies |  MJCF robot |  2D primitives |
Using the wgpu backend, Nexus can run on all major hardware and browsers (tested on Edge, Chrome, Firefox on Windows,
Linux, and MacOS). It is currently not compatible with Safari which has stronger restrictions on supported shaders.
It supports both 2D and 3D.
Creating a Nexus scene is done by initializing rigid-bodies, colliders, joints, etc. using Rapier types. They are then converted to GPU resources internally. Nexus ships with a viewer built on top of kiss3d; it is capable of rendering the Nexus scene efficiently without any GPU→CPU synchronization when using its default (webgpu) backend.
use khal::backend::GpuTimestamps;
use nexus_viewer3d::NexusViewer;
use nexus3d::prelude::{NexusCapacities, NexusPipeline, NexusState, RbdCoupling};
use rapier3d::prelude::*;

pub async fn run(
    viewer: &mut NexusViewer,
    pipeline: &mut NexusPipeline,
) -> anyhow::Result<NexusState> {
    const NXZ: isize = 30;
    const NY: isize = 70;

    let capacities = NexusCapacities::default().rbd_collisions(500_000);
    let mut state = NexusState::new(capacities);
    let no_coupling = RbdCoupling::NONE;

    /*
     * Falling dynamic objects.
     */
    for j in 0..NY {
        let max_ik = NXZ / 2;
        for i in -max_ik..max_ik {
            for k in -max_ik..max_ik {
                let x = i as f32 * 1.1 + j as f32 * 0.01;
                let y = j as f32 * 1.1 + 0.6;
                let z = k as f32 * 1.1 + j as f32 * 0.01;
                let pos = Vec3::new(x, y, z);

                let body = RigidBodyBuilder::dynamic().translation(pos).build();
                let collider = ColliderBuilder::cuboid(0.5, 0.5, 0.5).build();
                let shape = collider.shared_shape().clone();
                let handle = state.insert_rigid_body(body, collider, no_coupling);
                viewer.insert_shape(handle, &shape, Pose::IDENTITY);
            }
        }
    }

    /*
     * Floor made of large cuboids.
     */
    {
        let thick = NXZ as f32 * 1.5;
        let height = 12.0;
        let walls_color = Vec4::new(0.6, 0.8, 1.0, 0.3);
        let walls = [
            (Vec3::new(0.0, -0.5, 0.0), Vec3::new(thick, 0.5, thick)),
            (Vec3::new(thick, height, 0.0), Vec3::new(0.5, height, thick)),
            (
                Vec3::new(-thick, height, 0.0),
                Vec3::new(0.5, height, thick),
            ),
            (Vec3::new(0.0, height, thick), Vec3::new(thick, height, 0.5)),
            (
                Vec3::new(0.0, height, -thick),
                Vec3::new(thick, height, 0.5),
            ),
        ];

        for (wall_pos, wall_sz) in walls {
            let body = RigidBodyBuilder::fixed().build();
            let collider = ColliderBuilder::cuboid(wall_sz.x, wall_sz.y, wall_sz.z)
                .translation(wall_pos)
                .build();
            let shape = collider.shared_shape().clone();
            let handle = state.insert_rigid_body(body, collider, no_coupling);
            viewer.insert_shape_with_color(handle, &shape, Pose::from_translation(wall_pos), walls_color);
        }
    }

    let mut timestamps = GpuTimestamps::new(viewer.backend(), 2048);
    viewer.scene3d_mut().add_directional_light(glamx::Vec3::new(1.0, -2.0, 3.0));

    // Optional finalize, useful so we can render even before starting the simulation.
    state.finalize(viewer.backend()).await?;

    while viewer.render_frame().await {
        if viewer.simulating() {
            pipeline
                .simulate(viewer.backend(), &mut state, Some(&mut timestamps))
                .await?;
        }
        viewer.sync(&mut state, Some(&mut timestamps)).await?;
    }

    Ok(state)
}
Why rust-gpu?
You might be wondering why we decided to pick rust-gpu for such an ambitious project. Well, we tried many different
alternatives for single-source cross-platform GPU compute: WGSL, WESL, Slang. Unfortunately none of these reached the
quality of developper experience we were hopping for, either because of language limitations (with WGSL/WESL), or due to
difficulties to interface with a C++ stack and a lack of IDE tooling and package manager for sharing shaders across
projects (Slang).
Rust-gpu on the other hand lets us write shaders in Rust directly. It even allows us to reuse shader code across crates
using our beloved cargo. Because it is Rust, we don’t need to learn yet another programming language: we can even reuse
some of our (originally non-GPU) mathematics libraries (like glamx for advanced operations like the Singular Value
Decomposition), and we can write complex procedural macros in khal to interface the GPU code with the CPU code and
get compile-time type checking on kernel invocations! Moreover, the CPU code can depend on the GPU crate, so you can reuse the
GPU structures directly, eliminating all difficulties wrt. data layout mismatch. Finally, you can run your GPU code on the
CPU to debug easily like any other piece of regular Rust code. The productivity gain is massive, and writing GPU code
that way is much more pleasurable as a Rust developer!
But, still, is Rust the right choice for writing high-performance compute shaders? We are confident that, yes, it is a strong option. We have actually observed a growing interest in writing compute shaders in Rust during the past few months with:
cuda-oxide: recently announced by NVidia for compiling Rust code to Cuda. It is somewhat similar in goals torust-cuda.cutile-rs: Rust-based DSL for tile-based kernel programing, also maintained by NVidia.cubecl: Rust-based DSL for cross-platform gpu compute maintained by Tracel-AI.
If NVidia themselves start to develop major interest into using Rust for CUDA, this suggests Rust on GPU isn’t a bad idea after all. And this urges us to build a solid cross-platform scientific computing ecosystem in Rust as early as possible, so the Rust community doesn’t get locked into the proprietary Cuda environments.
On a final note, it also feels encouraging that Khronos acknowledged the relevance of rust-gpu by listing it as one of
the options on their recent Shader Compiler Survey: https://www.surveymonkey.com/r/LKWFQ3M (not sure how long that link
will remain valid).
Python bindings
Both the robotics and the machine learning communities strongly rely on Python. And since Nexus aims to also be beneficial to both, we automatically generated Python bindings. The general design of the Python bindings aims to match the Rust API as closely as possible in order to keep them as thin as possible (and make their maintainance easier). Bindings for the viewer are also provided in the same package.
"""Python port of `crates/examples3d/boxes3.rs`.

A grid of dynamic cuboids falls into a walled box. Run with:

    maturin develop -m crates/nexus_python3d/Cargo.toml --features metal
    python crates/nexus_python3d/examples/boxes3.py
"""

from nexus3d import (
    NexusViewer,
    NexusPipeline,
    NexusState,
    RbdCoupling,
    RigidBodyBuilder,
    ColliderBuilder,
    GpuTimestamps,
    Vec3,
    Vec4,
    Pose,
)

NXZ = 30
NY = 70

def run(viewer: NexusViewer, pipeline: NexusPipeline) -> NexusState:
    state = NexusState()
    no_coupling = RbdCoupling.NONE

    # Falling dynamic objects.
    for j in range(NY):
        max_ik = NXZ // 2
        for i in range(-max_ik, max_ik):
            for k in range(-max_ik, max_ik):
                x = i * 1.1 + j * 0.01
                y = j * 1.1 + 0.6
                z = k * 1.1 + j * 0.01
                pos = Vec3(x, y, z)

                body = RigidBodyBuilder.dynamic().translation(pos).build()
                collider = ColliderBuilder.cuboid(0.5, 0.5, 0.5).build()
                shape = collider.shared_shape()
                handle = state.insert_rigid_body(body, collider, no_coupling)
                viewer.insert_shape(handle, shape, Pose.IDENTITY)

    # Floor made of large cuboids.
    thick = NXZ * 1.5
    height = 12.0
    walls_color = Vec4(0.6, 0.8, 1.0, 0.3)
    walls = [
        (Vec3(0.0, -0.5, 0.0), Vec3(thick, 0.5, thick)),
        (Vec3(thick, height, 0.0), Vec3(0.5, height, thick)),
        (Vec3(-thick, height, 0.0), Vec3(0.5, height, thick)),
        (Vec3(0.0, height, thick), Vec3(thick, height, 0.5)),
        (Vec3(0.0, height, -thick), Vec3(thick, height, 0.5)),
    ]
    for wall_pos, wall_sz in walls:
        body = RigidBodyBuilder.fixed().build()
        collider = (
            ColliderBuilder.cuboid(wall_sz.x, wall_sz.y, wall_sz.z)
            .translation(wall_pos)
            .build()
        )
        shape = collider.shared_shape()
        handle = state.insert_rigid_body(body, collider, no_coupling)
        viewer.insert_shape_with_color(
            handle, shape, Pose.from_translation(wall_pos), walls_color
        )

    timestamps = GpuTimestamps(viewer, 2048)
    viewer.add_directional_light(Vec3(1.0, -2.0, 3.0))

    # Optional finalize, useful so we can render even before starting the simulation.
    state.finalize(viewer)

    while viewer.render_frame():
        if viewer.simulating():
            pipeline.simulate(viewer, state, timestamps)
        viewer.sync(state, timestamps)

    return state


def main() -> None:
    viewer = NexusViewer()
    viewer.init_backend()
    pipeline = NexusPipeline()
    pipeline.preload_pipelines(viewer)
    run(viewer, pipeline)


if __name__ == "__main__":
    main()
    import os

    os._exit(0)
Reinforcement learning
We have been collaborating with Xavier Tao − @haixuantao − from 1ms.ai for feedbacks, optimizations, and contributions related to using the Nexus stack for Reinforcement Learning. While we are still early in the process, we are already able to train a simple robot to stand and walk, relying on Nexus’ batch simulation to accelerate the training loop. The entire project is in Rust.
Both videos below showcase a bipedal robot controlled by a neural network trained for standing (left) and walking (right) using Nexus multibody joints and batch simulations.
Next steps
While we present Nexus as a multi-physics engine, this release only supports rigid-body physics. We intend to extend it further by supporting more models for non-rigid physics. One of our next main objectives is the addition of an MPM solver (Material Points Method) with coupling with Nexus’ rigid-body solver.
We also intend to further improve the stability of multibodies, performances, and the public API of Nexus to make it easier to interact with the scene while the simulation is running.
Rapier: improvements for robotics
One of our main focus for Rapier in 2026 is the improvement of its robotics-oriented features. During the past three months, we started by addressing some long-standing bug reports on multibodies (both regarding crashes in instabilities).
Multibodies and MJCF
Since we wanted to test multibody simulations on more actual robot models, we implemented the support for MJCF files (i.e. the file format
from the MuJoCo project). These resulted in the mjcf-rs
crate as the low-level parser that is independent of Rapier, and
rapier3d-mjcf for loading these MJCF files as
rapier multibodies. We then added a new 3D example
that lets you browse through a collection of MJCF models and simulate them. It is capable of loading most robots from
the MoJoCo menagerie dataset (you will have to clone the dataset yourself), including actuator keyframes as showcased
in the video below.
The PhysicsWorld object
One common difficulty with using rapier as a beginner is the large number of different collections to create
before being able to run a simulation. Rapier 0.34 introduces a new structure PhysicsWorld that wraps all these fields so
you can create them all at once. Using PhysicsWorld is not mendatory so you are free to keep using the individual
resounces and physics pipeline.
pub struct PhysicsWorld {
    /// Gravity applied to all dynamic bodies each step.
    pub gravity: Vector,
    /// Parameters controlling the simulation (timestep, solver iterations, etc.).
    pub integration_parameters: IntegrationParameters,
    /// The main simulation pipeline that orchestrates each physics step.
    pub physics_pipeline: PhysicsPipeline,
    /// Manages active/sleeping body groups (islands) for efficient simulation.
    pub islands: IslandManager,
    /// The broad-phase acceleration structure for fast spatial queries.
    pub broad_phase: BroadPhaseBvh,
    /// Precise contact and intersection detection between collider pairs.
    pub narrow_phase: NarrowPhase,
    /// All rigid bodies in this world.
    pub bodies: RigidBodySet,
    /// All colliders (collision shapes) in this world.
    pub colliders: ColliderSet,
    /// All impulse-based joints (hinges, springs, ropes, etc.).
    pub impulse_joints: ImpulseJointSet,
    /// All multibody joints (kinematic chains, articulations).
    pub multibody_joints: MultibodyJointSet,
    /// The continuous collision detection solver.
    pub ccd_solver: CCDSolver,
}
In addition, it exposes helper functions for inserting bodies, colliders, joints, etc. and stepping the simulation. All the fields are public if you need finer grained control or need to avoid some situations where borrowing the whole physics world instead of some of its components would be limiting.
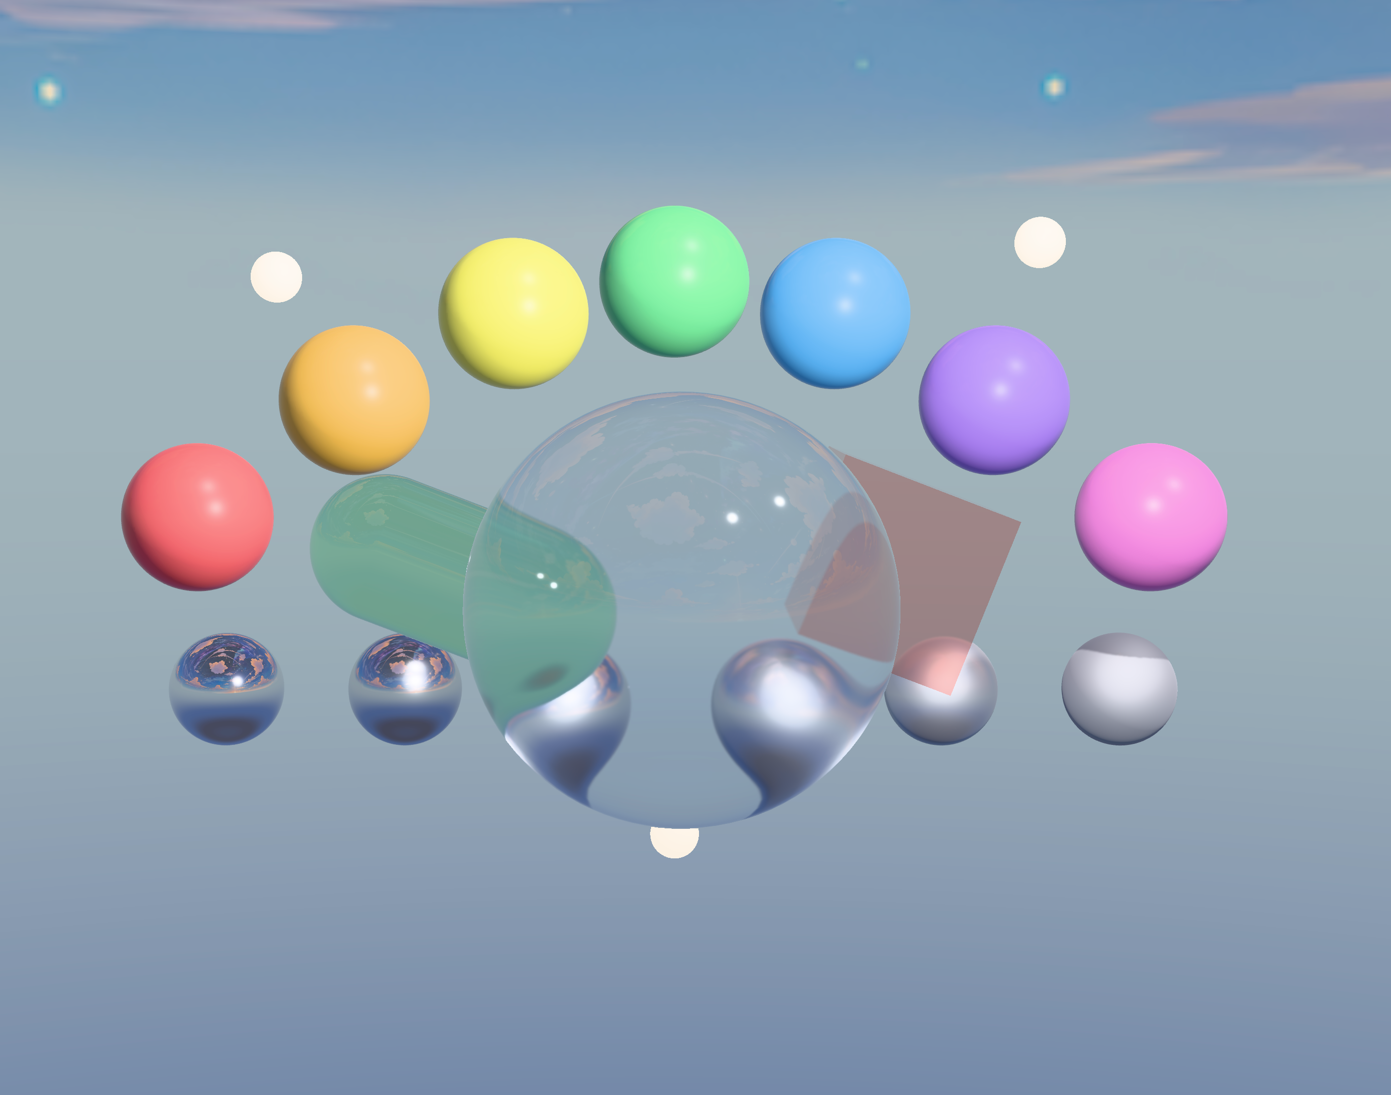
Kiss3d: advanced rendering effects
Most popular physics engines from the robotics community ship with a nice viewer. This becomes especially relevant if we want the viewer exposed through python bindings while being able to interact with the Nexus GPU resources efficiently. Therefore, we have been enhancing the quality of the Kiss3d renderer significantly during the past quarter. We also added a hardware-accelerated path-tracer for high-fidelity rendering.
 PBR material | Refraction |  Order Independent Transparency |
 GLTF + animations |  Depth of field |  Offscreen rendering |
 Reflections |  Bloom |  Path tracing |
Of course, all these rendering features are cross-platform, and compatible with the web (though the path-tracer won’t leverage GPU RT-specific hardware on the web). The kiss3d online examples have been updated for showcasing all the new features.
Kiss3d is used as the renderer for the Rapier and Nexus viewers. In particular, with Nexus, it enables rendering
all the simulated objects without any GPU→CPU synchronization since all the data needed for rendering is already available
on the GPU by making both use the same wgpu device.
If you enable the rt-switcher cargo feature of Kiss3d, then pressing keys from F5 to F8 will switch the renderer
to the path tracer where F5 is lowest quality preset and F8 highest. Press F4 to switch back to the rasterizer.
That feature is enabled on all Rapier and Nexus demos too. Keep in mind that it can be pretty slow on platforms with no
RT hardware acceleration (including all browsers).
Conclusion
During this second quarter we reached a significant milestone on our cross-platform GPU physics journey by releasing the
rigid-body solver of Nexus, written with rust-gpu. With the introduction of python bindings and
the support of the popular MJCF format, we aim to reach a wider audience from the Robotics and ML communities.
We intend to make of Nexus a major multi-physics engine for large-scale robotics, ML,
animations, and engineering by adding more rigid and non-rigid solvers in the future like MPM.
We also started improving Rapier (our CPU-based rigid-body physics engine) for robotics by fixing long-standing bugs and stability issues on multibodies. We also reworked its testbed to make it easier to use, making examples more self-contained by avoiding internal callbacks.
Finally, the improvements of our Kiss3d renderer allowed us to easily integrate advanced rendering effects as well as a path tracer to our physics showcases, while at the same time making it available through the Python bindings too. By ensuring direct compatibility with the dependency versions shared with Nexus, we can guarantee the ability to render complex 3D physics simulations without any GPU→CPU synchronization, ensuring excellent performances in most browsers too.
Acknowledgements
We cannot thank enough:
- Futurewei for sponsoring our physics work for robotics and AI.
- NGI Zero Commons Fund for accepting our grant proposal to further extend the solvers supported by Nexus.
- The maintainers of all the fantastic libraries we build on top of.
Thanks to all the former, current and new sponsors! This helps us tremendously to sustain our Free and Open-Source work. Finally, a huge thanks to the whole community and contributors!
Help us sustain our open-source work by sponsoring us on GitHub sponsors or by reaching out ♥
Join us on discord!